
Create a spreadsheet
Step 1: Layout a spreadsheet for data collection
Your task is to a spreadsheet for data collection. Use the spreadsheet that you created in assignment 2 of this module. In this exercise, you will make up the results without any real data, but imagine you would use this spreadsheet to actually collect data. This is a so-called observational / experimental study where you collect data samples, make observations and record the results in a spreadsheet.
Your experiment
You are collecting the content of 20 bins from two public spaces in Zurich (Bäckeranlage, Landiwiese), ten bins from each location. Each bin contains 30 kilograms of mixed solid waste. You are interested in the composition of the waste, so you separate the waste into 6 categories: paper, plastic, glass, metal, organic, other. You are also interested how waste composition varies between weekends and weekdays, so you collect 5 bins on a Sunday morning and 5 bins on a Thursday morning at the two locations. Your sample collection and analysis is planned for Sunday, 31st March 2024 and Thursday, 4th April 2024. For documenting the waste composition, you use a digital scale with an accuracy of 0.1 kg.
Layout the spreadsheet
- Layout the spreadsheet for the described experiment.
- Make up the results for the waste composition (e.g. 3.2 kg paper, 4.5 kg plastic, etc.).
Step 2: Create a new repository on GitHub & clone to Posit Cloud
- Open the GitHub Organisation for the course https://github.com/rbtl-fs24
- To right of the field “Find a repository”, click on the green “New” button.
- In the “Repository name” field write
samples-USERNAME. Replace USERNAME with your GitHub username. Avoid using spaces.
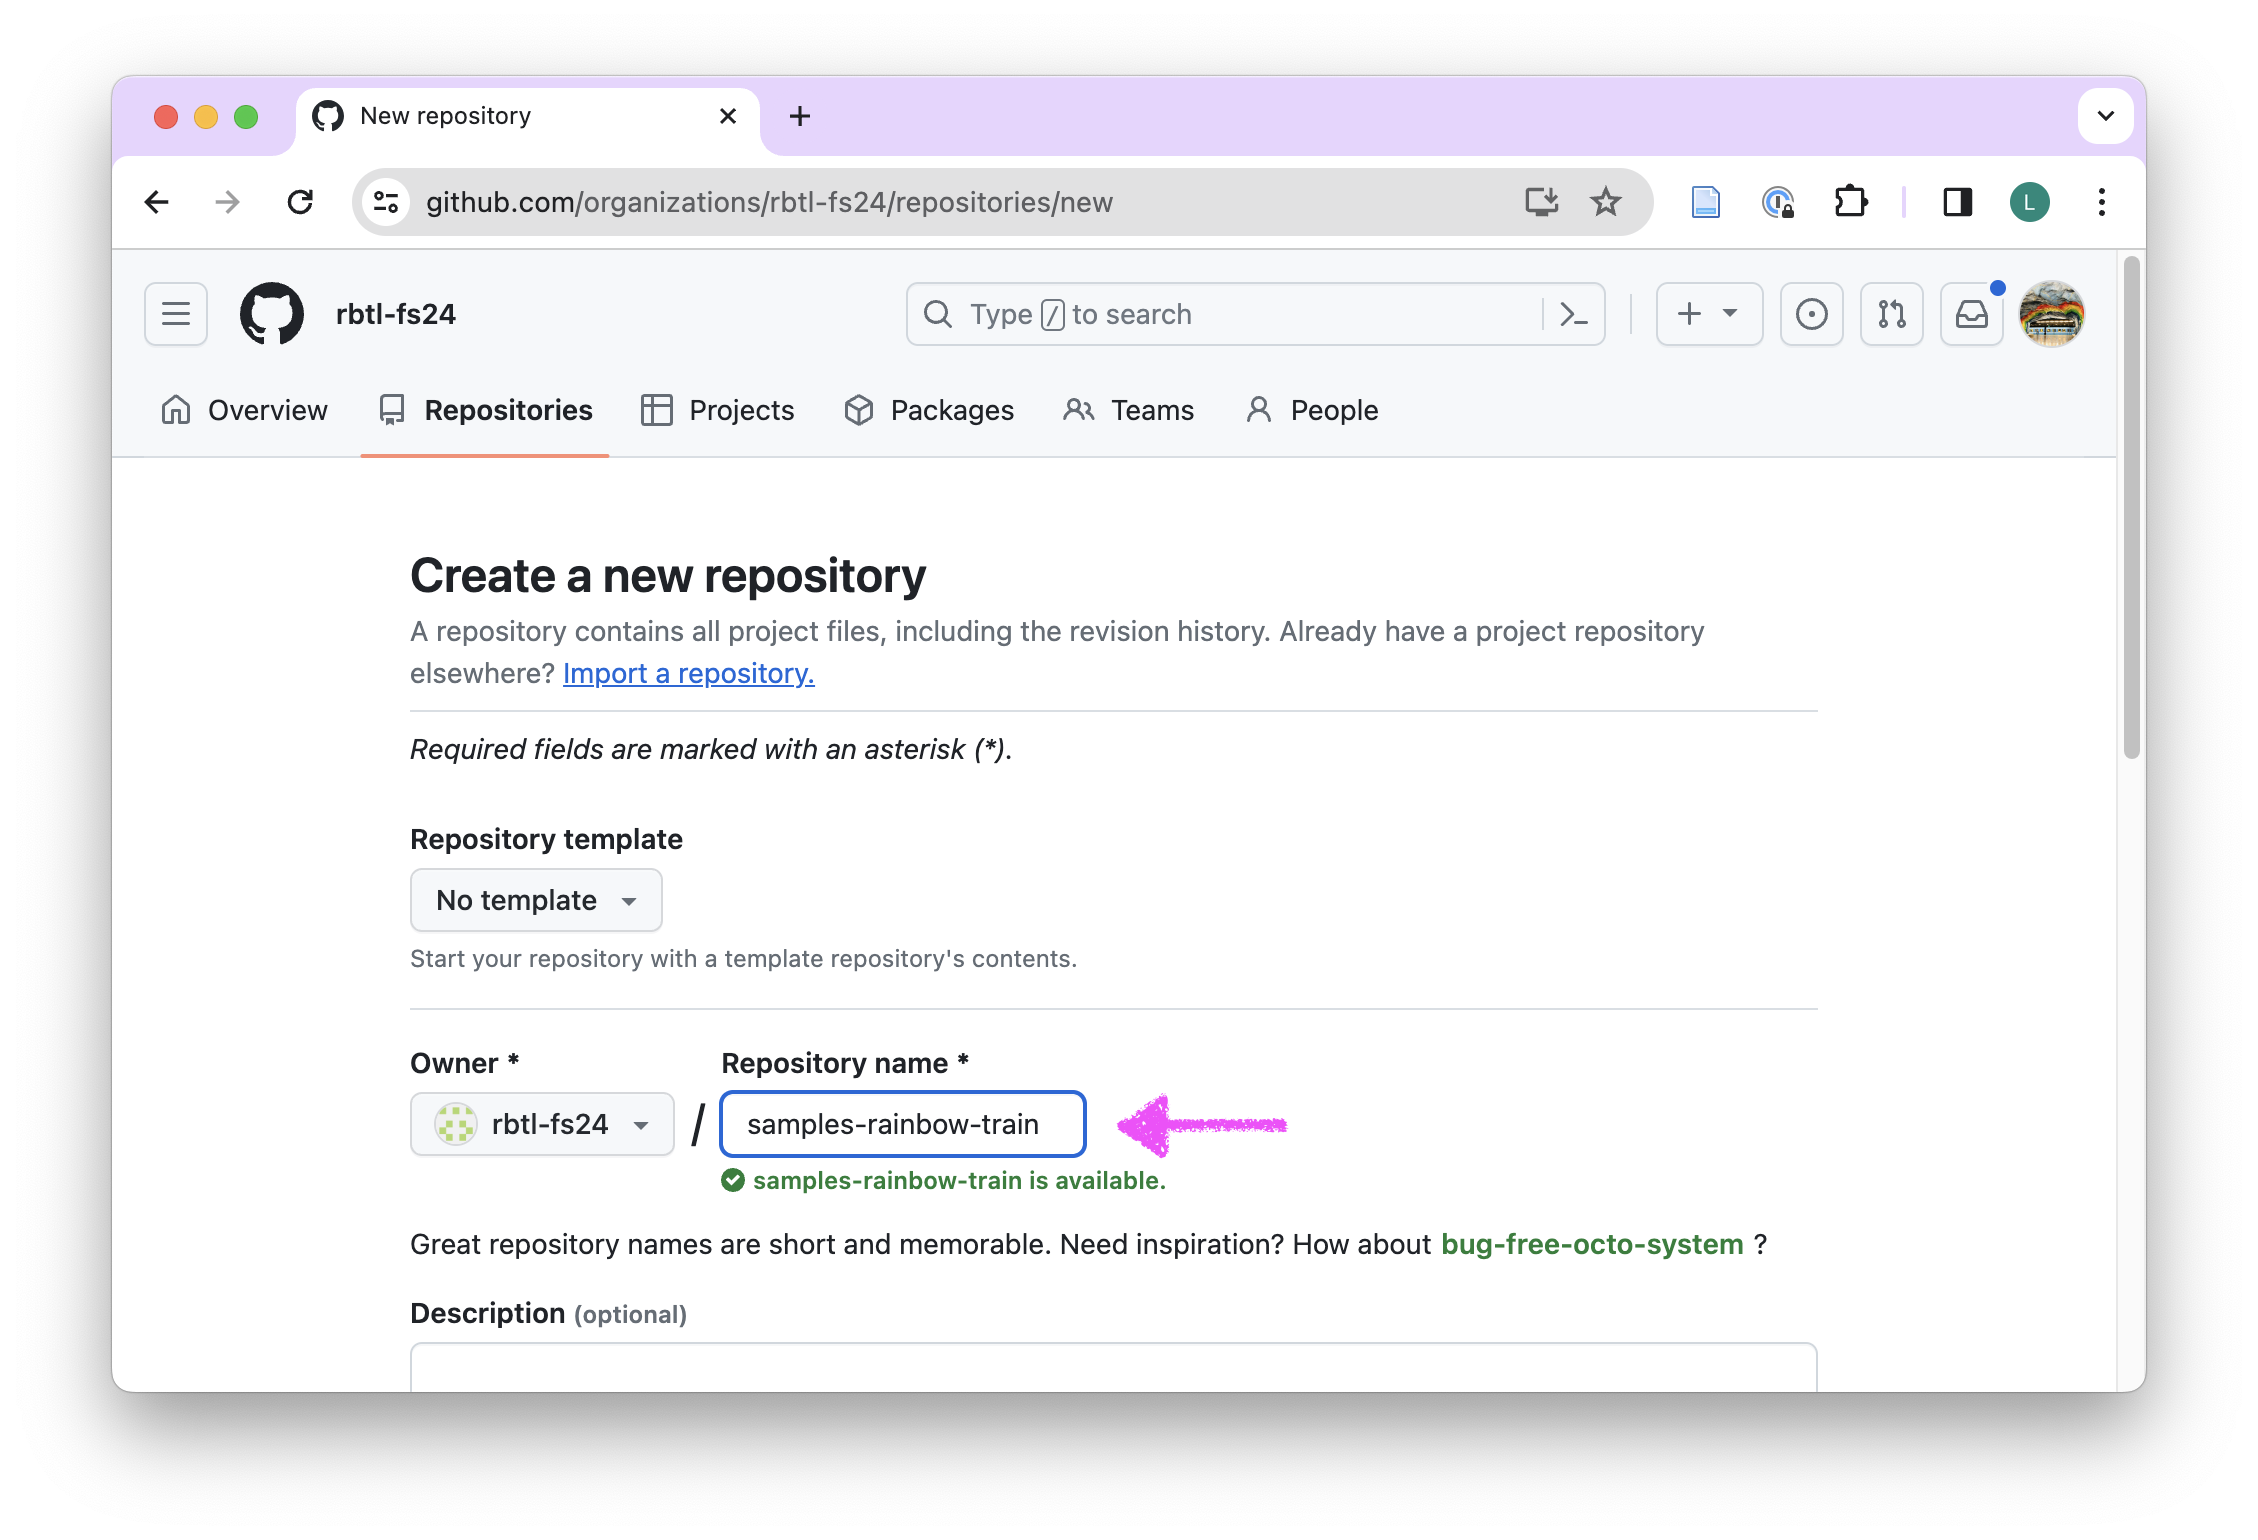
- Scroll down on the same page, and click “Create repository”.
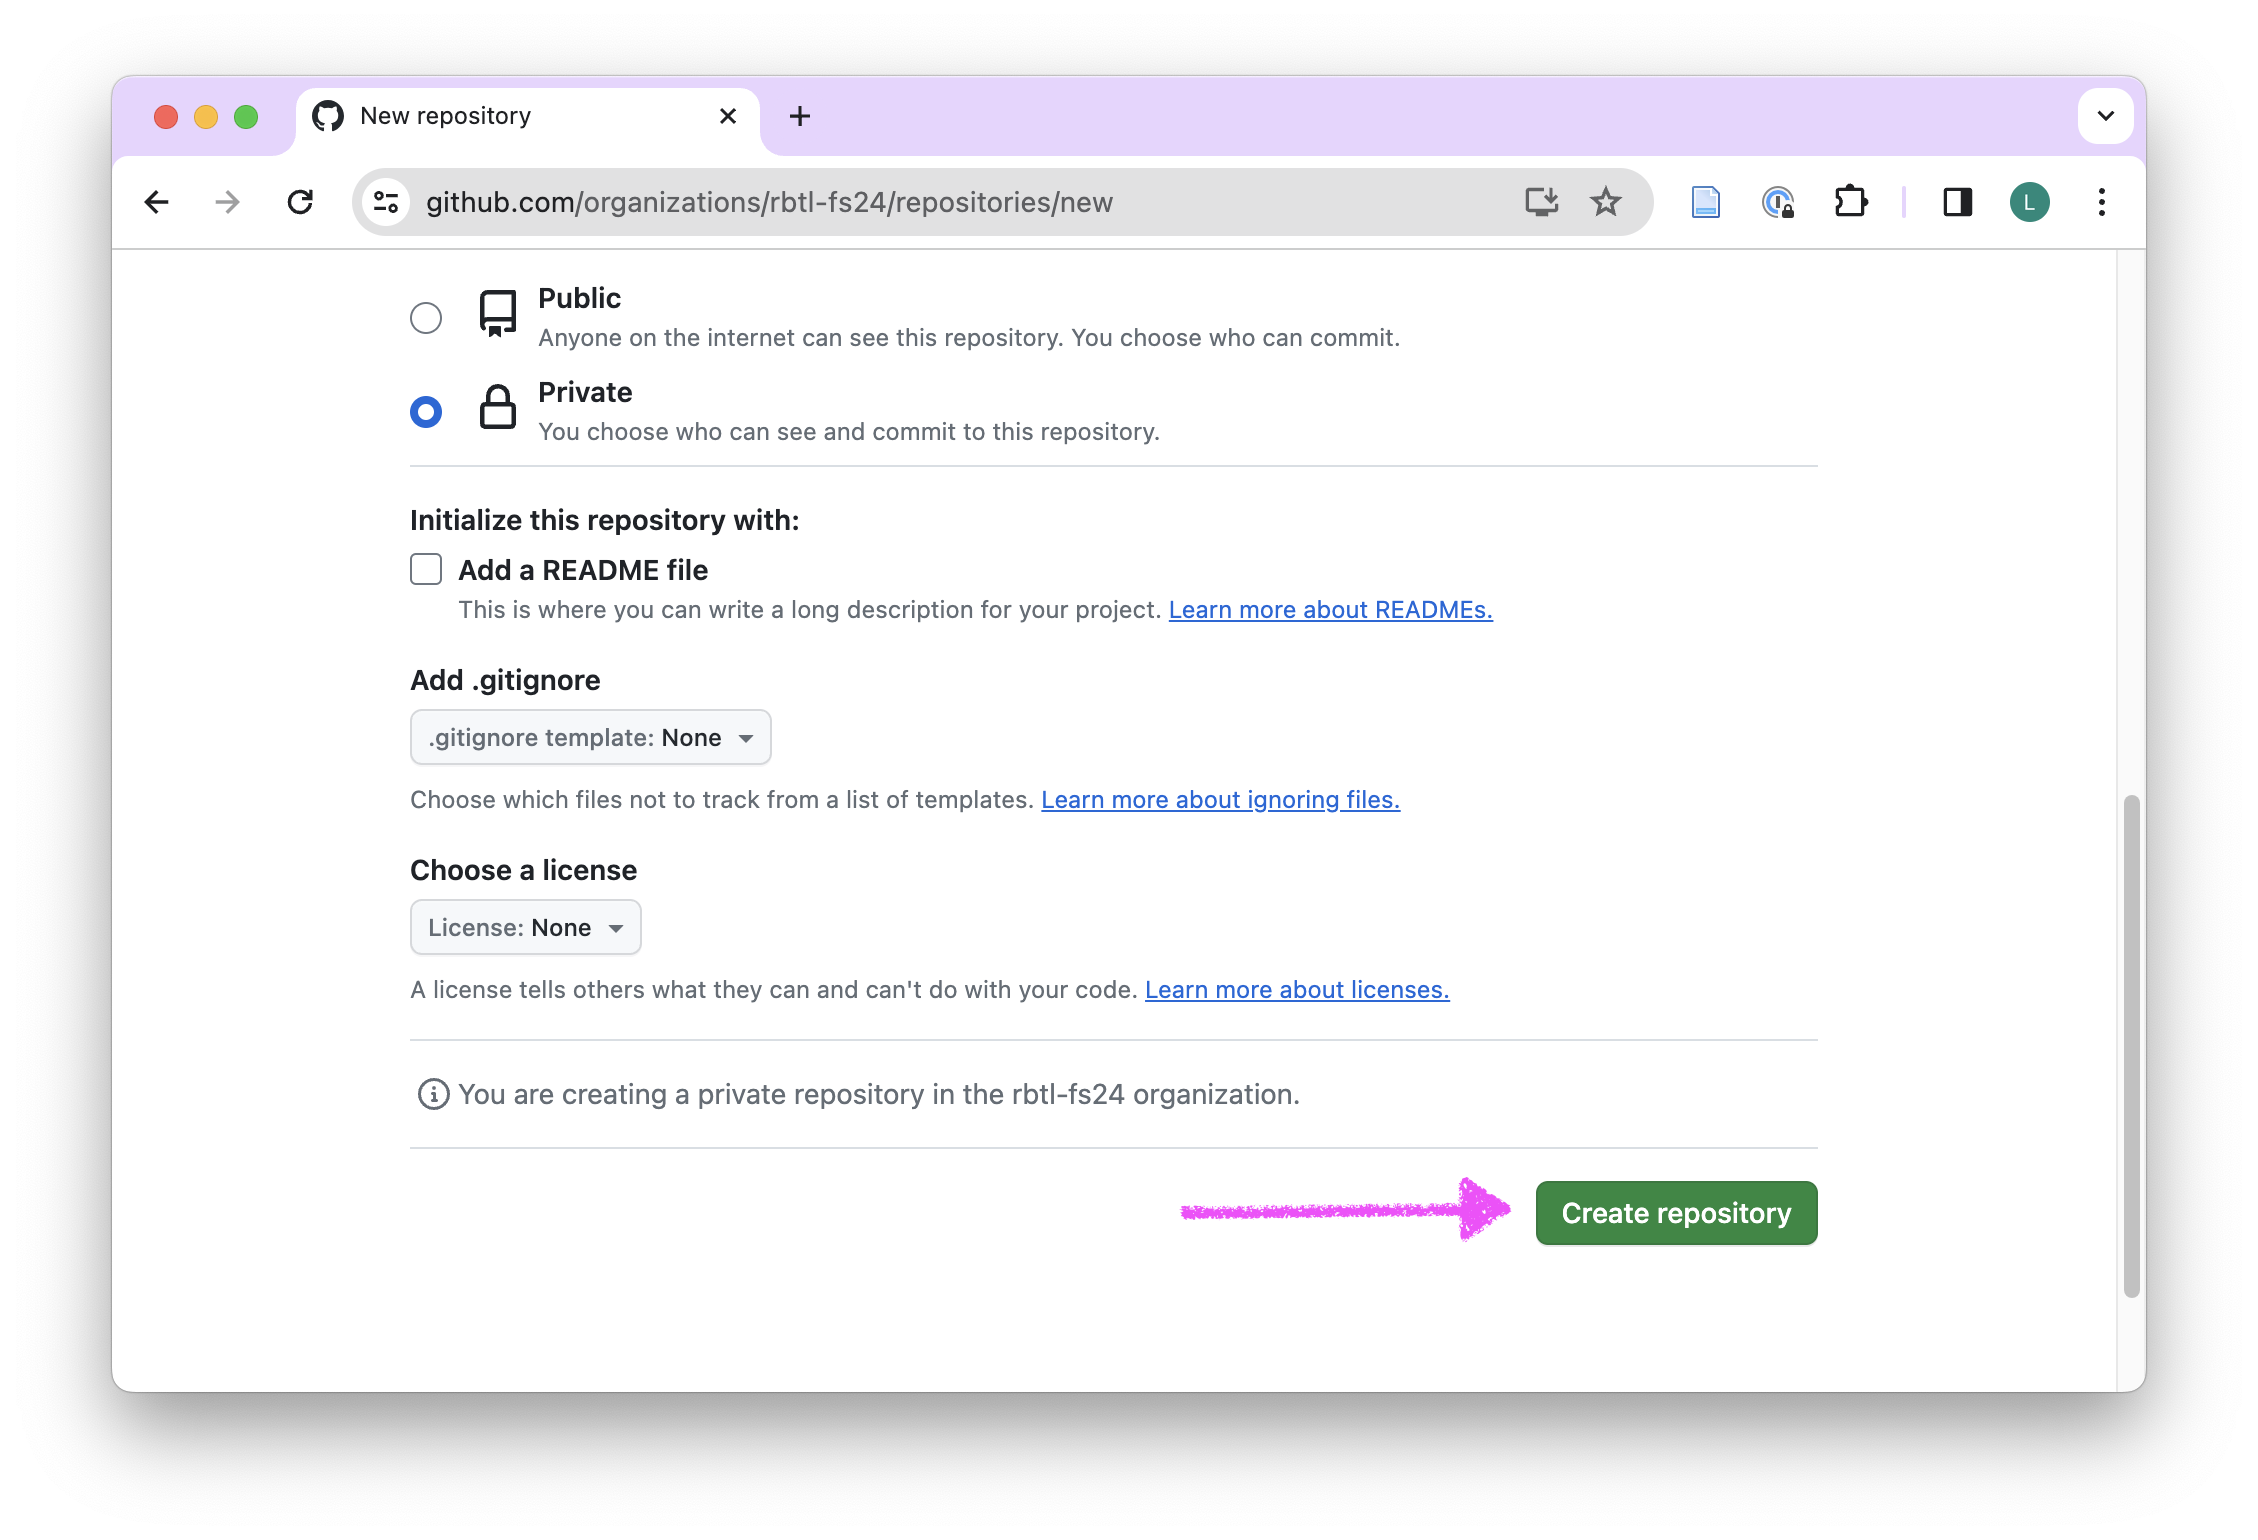
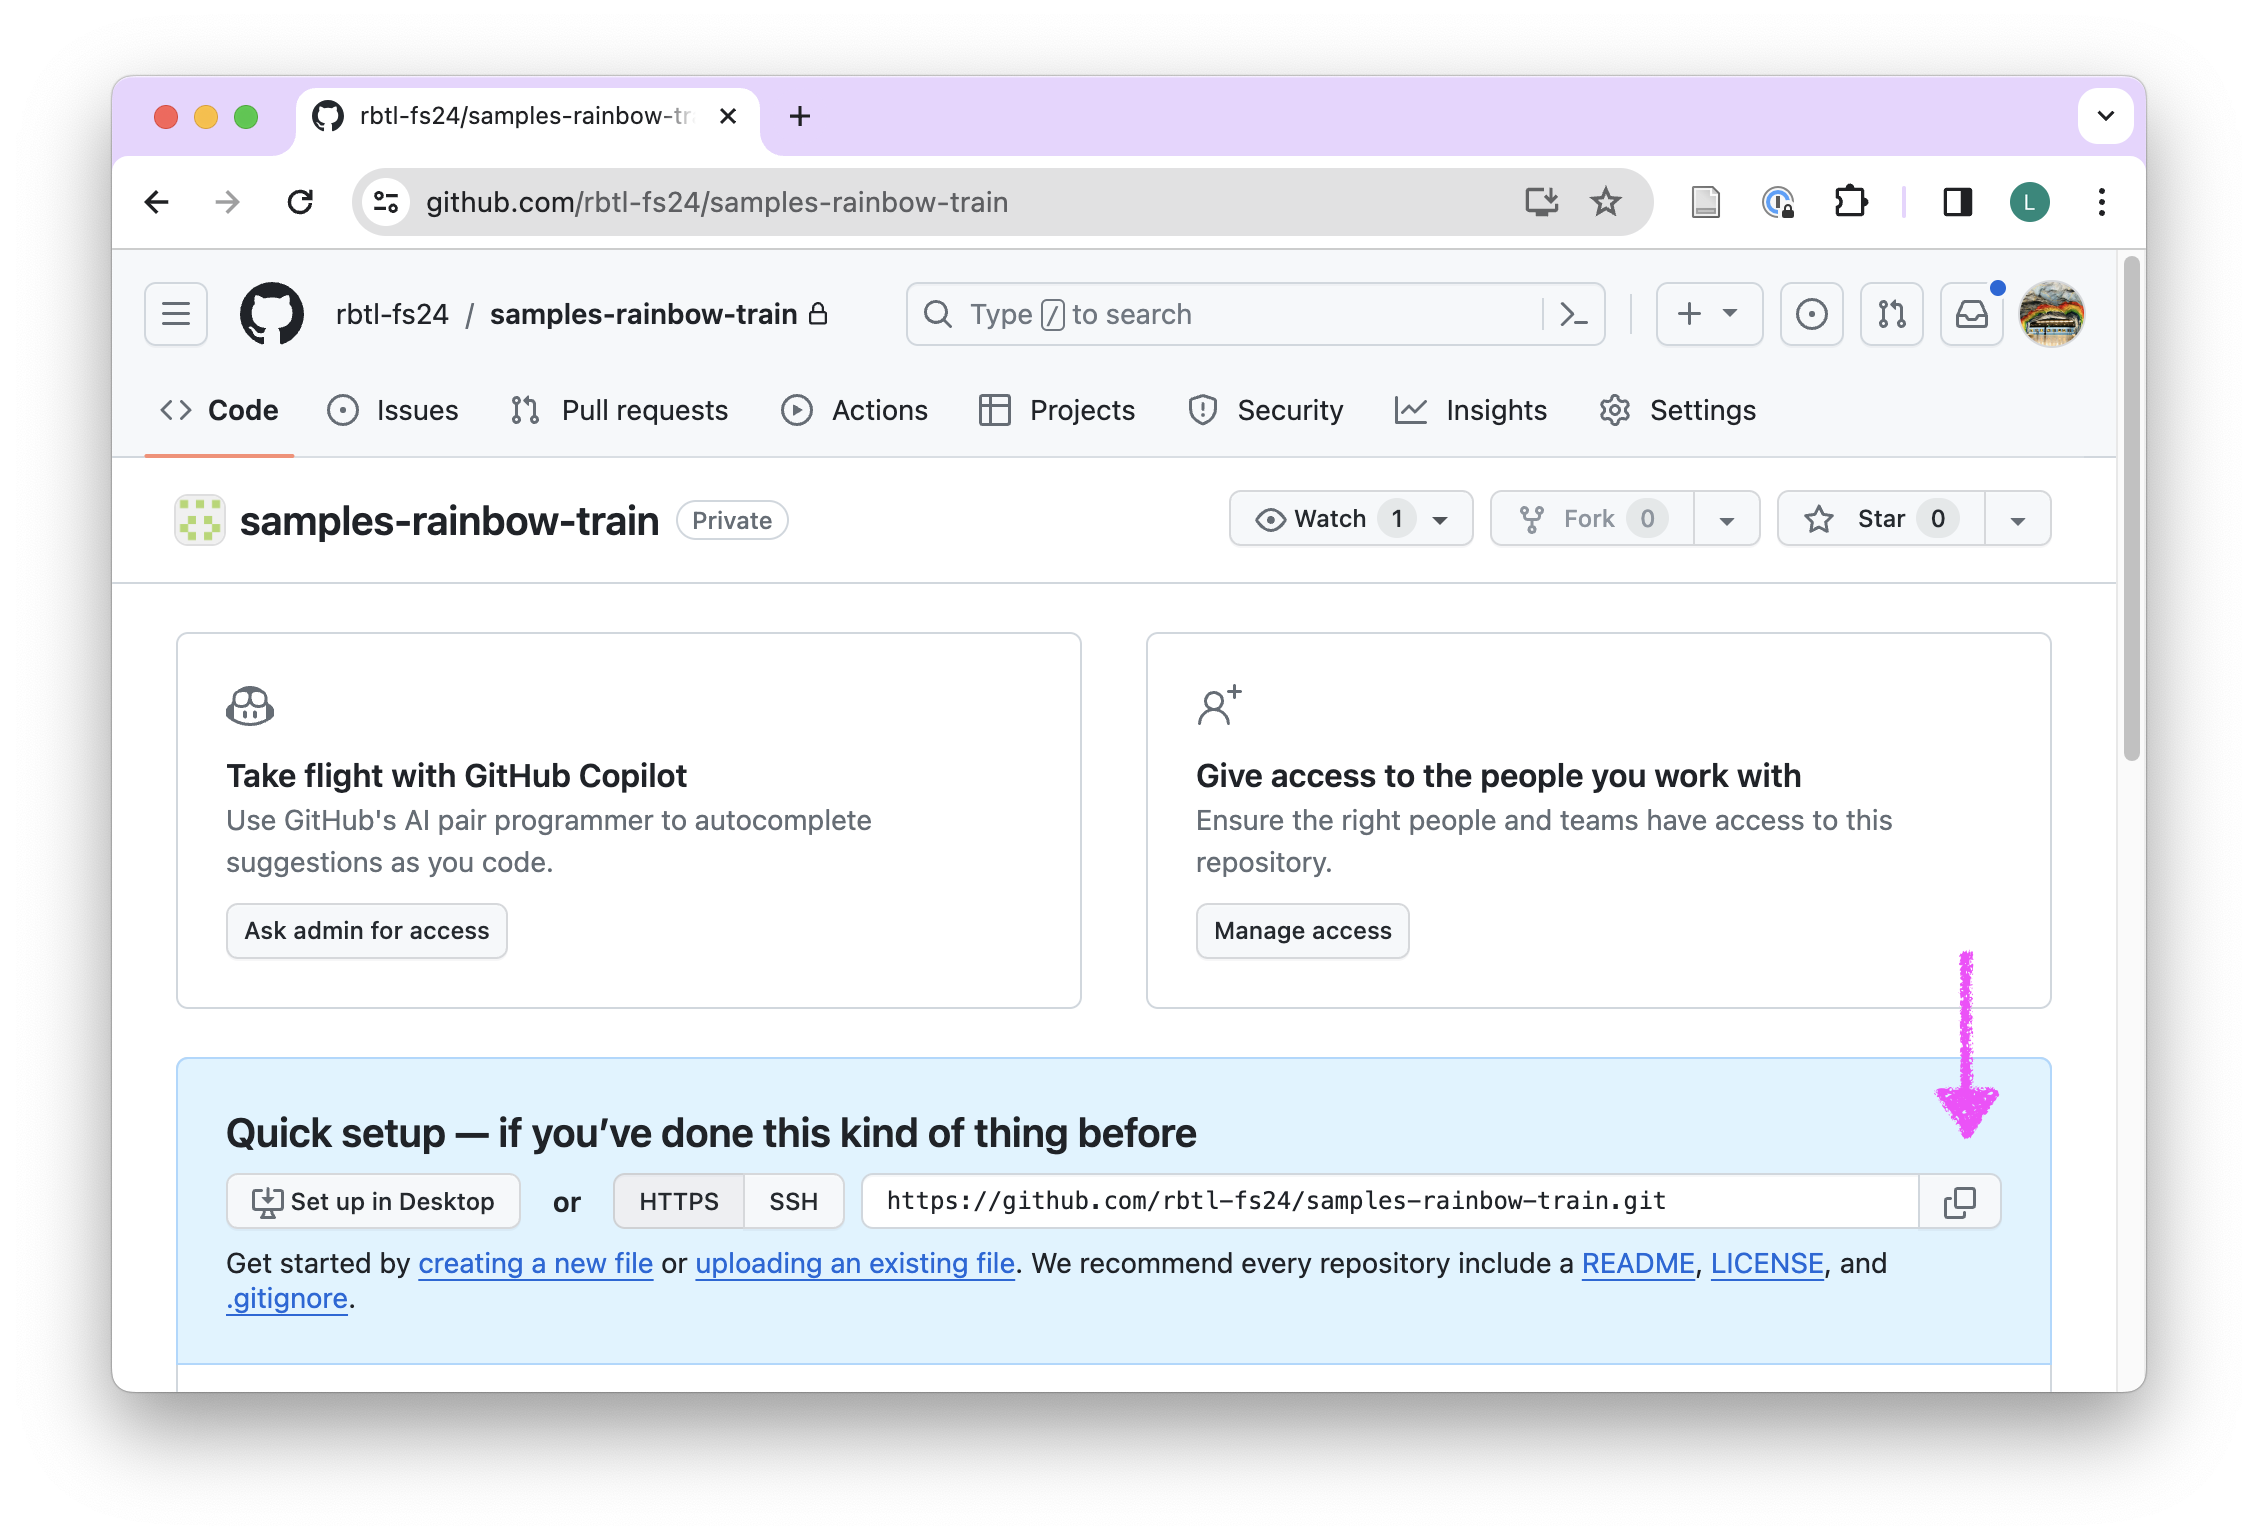
- In the “Quick setup” field, click on the clipboard next to the HTTPs URL
- Open the rbtl-fs24 workspace on posit.cloud
- Click New Project > New Project from Git Repository
- Paste the HTTPS URL from GitHub into the “URL of your Git Repository” field.
- Wait until the project is deployed.
Step 3: Create a new Quarto document
In your samples-USERNAME project in RStudio on Posit Cloud, go to the menu bar and select [File > New File > Quarto document] to create a Quarto document with HTML output. Render the document, which will ask you to give it a name – you can use import-data.qmd.
- Add a title and your name as the author to the YAML metadata at the top of the document.
- Delete the text and code-chunks below the YAML metadata.
- Add a section formatted as Heading 2 and title: “Import data”.
- Make a commit for all files and use the commit message “Create Quarto document for data import” (see also Step 6 for more detailed guidance).
Step 4: Google authentication and data import
- Add a code-chunk to your Quarto document.
- Add the following code to your code-chunk.
library(googlesheets4)
read_sheet("https://docs.google.com/spreadsheets/d/1jB3aNf_UCQe13YqxHWfFnEYQFTqcwRFmidttsGI3PYI/edit#gid=0")- Run the code inside the code-chunk and look at the prompt in your Console (see note below for instructions).
Access for googlesheets4 package
In your Console, you will see the following prompt:
Is it OK to cache OAuth access credentials in the folder
~/.cache/gargle between R sessions?
1: Yes
2: No
Write: 1 and press Enter. This will cache your access credentials for the googlesheets4 package and a new tab in your browser will open, where you will be asked to log in to your Google account and grant access to the googlesheets4 package. At the end of the process copy the authorization code to clipboard. Open your Posit Cloud tab again and look at the Console in RStudio.
You will see the following prompt:
Enter authorization code: Paste the authorization code from your clipboard and press Enter. This will complete the authentication process.
Step 5: Import your spreadsheet
- Replace the hyperlink inside the
read_sheet()function with the hyperlink to your spreadsheet. - Use the assignment operator
<-to assign the data to an object namedwaste_data. - Use the
glimpse()function from the dplyr package to inspect thewaste_dataobject.
Step 6: Commit and push your changes
- Navigate to the Git pane in the top-right window of RStudio
- Check the box next to all files to stage them for a commit (select one and then Crtl + A on keyborad to select all)
- Click on the “Commit” button
- Enter a commit message in the “Commit message” field
- Click on the “Commit” button
- Click on the “Push” button
- Enter your GitHub username and GitHub Personal Access Token (PAT) in the “Username” and “Password” fields
Do not use your GitHub password
You need to enter the GitHub Personal Access Token (PAT) you created in Step 1 to push your changes back to GitHub.
Step 7: Open an issue on GitHub
- Open github.com in your browser.
- Navigate to the GitHub organisation for the course.
- Find the repository samples- that ends with your GitHub username.
- Click on the “Issues” tab.
- Click on the green “New issue” button.
- In the “Title” field write: “Create spreadsheet and import data”.
- In the “Leave a comment” field, tag the course instructors @larnsce